Part 3 - Domain Hookup
Domain Optional: Skip to the next tutorial to keep using the free GCP appspot url.
Intro
Now, lets get personal and buy a domain to hookup to that sweet new site! Ready?!
{Reader performs deep contemplation now to decide what domain name to buy…}
In this part of the tutorial, the following sections will go over the key ingredients that make a custom domain yours and connected to AppEngine over SSL.
Tutorial Steps Outlined:
- Google Domain Steps
- Purchase Domain
- Connect Domain To AppEngine
- Use AppEngine SSL
Purchase Domain
The minimum fee for a domain name starts at \$12 for the name per year.
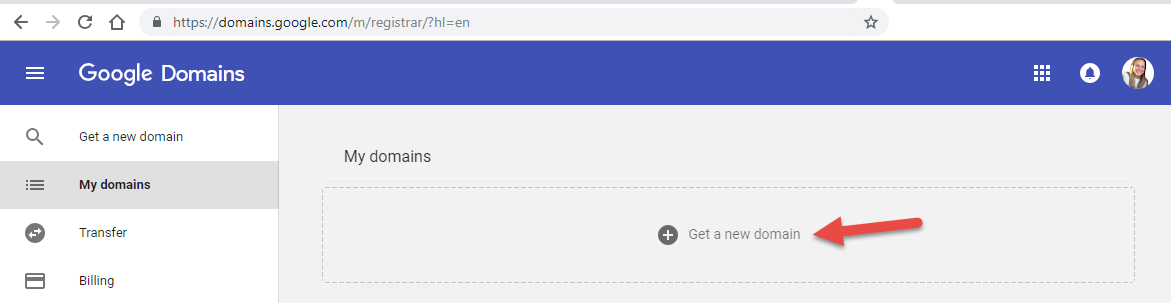
Open Google Domains to purchase and manage your domain. Then click on the Get a new domain button/card:
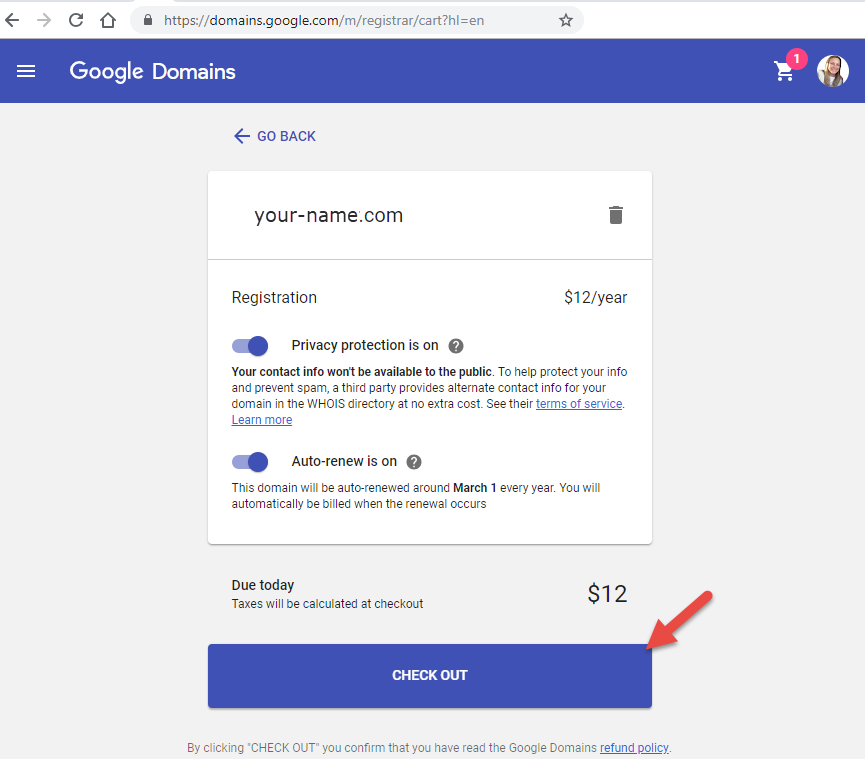
Next, you will need to search for a unique name. Purchase domain name to your liking by clicking the + shopping cart icon on the row and then clicking the cart icon in the top right menu. Click «CHECK OUT» and complete purchase on next screen by clicking «BUY».
Verify Domain Ownership
Next, browse to https://www.google.com/webmasters/verification/home and click «ADD A PROPERTY» if you do not see your domain currently listed.
If you are not currently listed as a verified owner, then click «Verify using a different method».
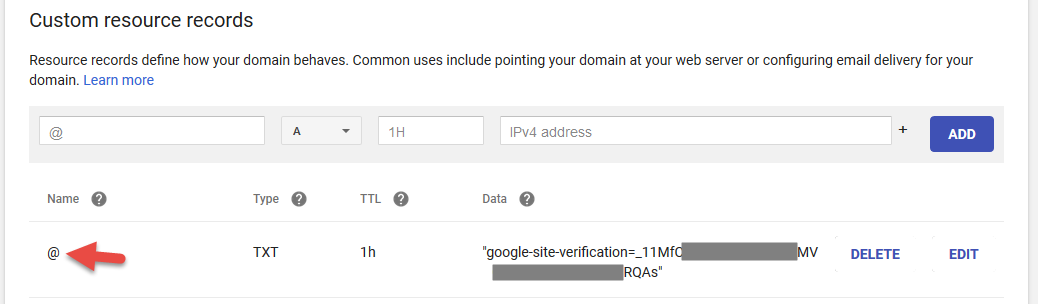
- Select «Google Domain» from the list and copy the TXT text and paste it into domains.google.com, under DNS - Custom resource records.
Make sure the name is ‘@’:
Connect Domain To AppEngine
Click on GCP’s hamburger menu in the top left hover over App Engine click Settings.
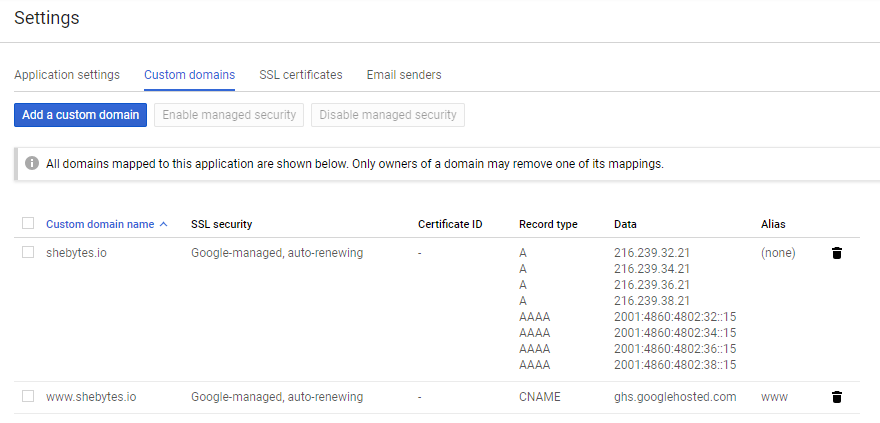
Click on the «Custom domains» tab in Settings, and click «Add a custom domain» button.
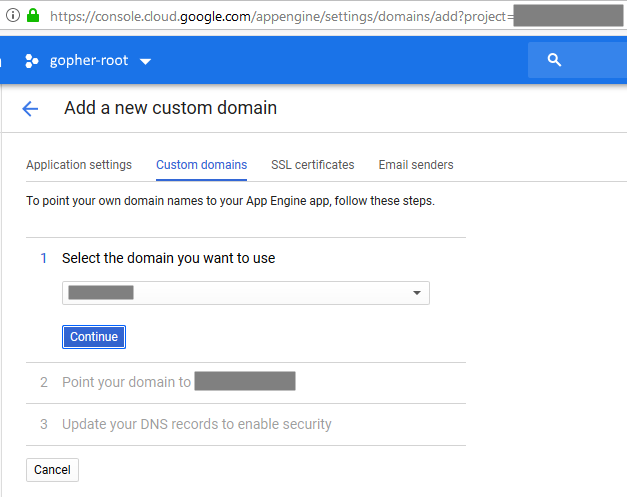
- Choose your domain from the drop-down in Step 1, click «Continue».
- Step 2 should expand to show your domain mappings for the domain with and without a www prefix.
- Click «Save mappings».
Step 3 should expand and display the DNS records we need to update with the domain registrar.
Open Google Domains again and click «DNS» from the left menu.
Add the following records (example in next section):
| Name | Type | TTL | Data | | ——— | —– | — | ——————— | | appengine | CNAME | 1h | ghs.googlehosted.com | | @ | A | 1h | 216.239.32.21 | | @ | AAAA | 1h | 2001:4860:4802:32::15 | | * | A | 1h | 216.239.34.21 | | * | AAAA | 1h | 2001:4860:4802:34::15 | | www | A | 1h | 216.239.36.21 | | www | AAAA | 1h | 2001:4860:4802:36::15 |
- Click «Done».
Domain DNS - Custom Resource Records Example:
NOTE: you only need to use one A (ip4) and one AAAA (ip6) record each for the hookup to work.
- Use name
@to give access to the root site. - Domain owner verification step from previous section.
- Use name
*as a wildcard for to give access to sub domains. - Use name
appenginewith typeCNAMEto tell app engine it’s cool to use this domain. - Use name
wwwto give access to the www alias specifically.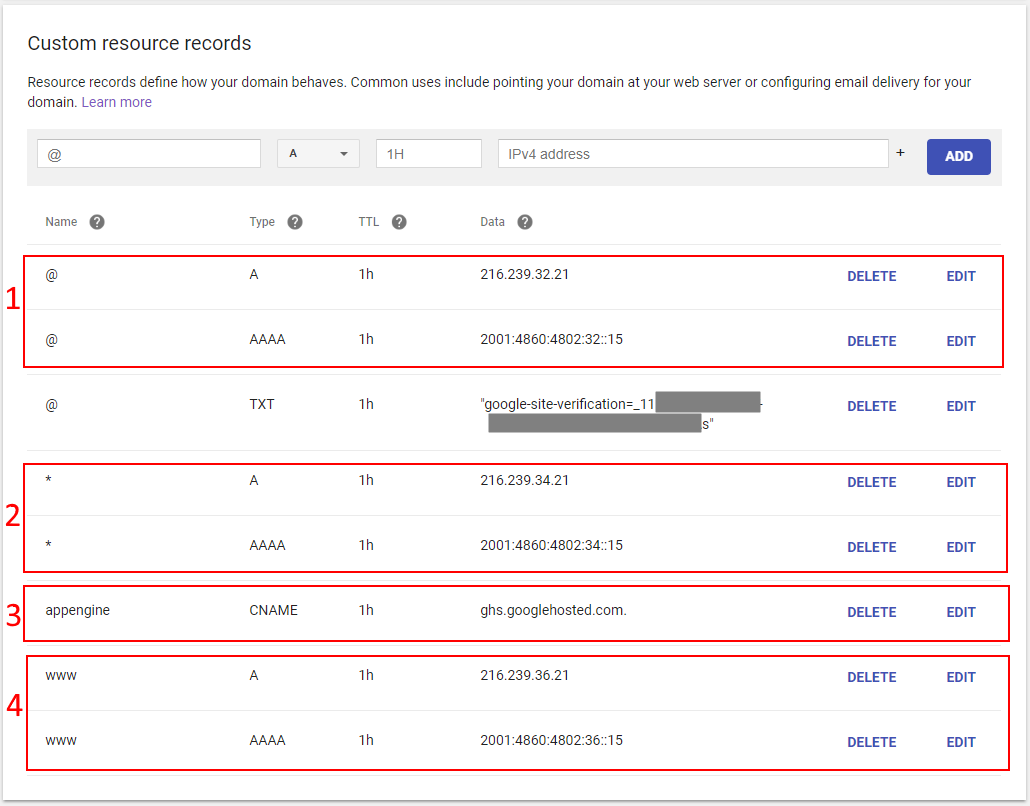
Use AppEngine SSL
Google provides a managed security option to take care of the SSL (Secure Socket Layer is a networking protocol) certificates meaning HTTPS works making the connection secure.
To enable SSL, check the checkbox in the header to select both custom domains and click Enable managed security.
A spinning gif should appear while the request is being processed. Note - this can take up to 24 hours.
To check the status via gcloud, run the following commands in your local terminal window:
# To see a list of certificates IDs for specific project:
gcloud --project=gopher-root app ssl-certificates lists

# Watch the ID move from the PENDING_AUTO_CERT column to SSL_CERTIFICATE_ID column:
gcloud app domain-mappings list
Once successful, the SSL security column should display with text «Google-managed, auto-renewing»:
NOTE: If a yellow stays over 24 hours, then you have something not setup correct, go through the steps above again.
READY ?!
Let’s give the new site a try….
The appspot URL and your new custom domain should return the same now.
TADA!

Next Step
Click the «Next» button below to proceed in this tutorial series to «Part 4 - Use Hugo To Create Site».